Windows 10 and 11 come with a default video editing app. The great thing is it’s free. It’s also very simple to use for doing basic video editing. In this guide I’ll show you how to cut a video on Windows video editor app as well as:
- Trim a video in Windows
- Split a video in Windows
- How to do Jump Cuts in Windows
Before you continue, learn how to Cut Video Online!
How to cut a video on Windows Video Editor
The default Window video editor let’s you do the following types of cuts:
- Trim video
- Split video
- Delete clip

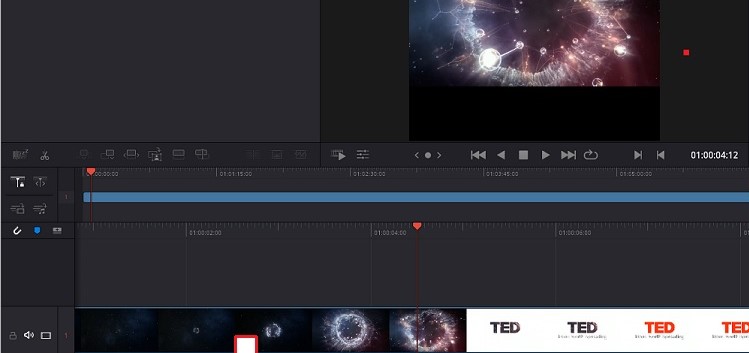
The video editor in Windows doesn’t work like professional video editors that have a time-line based editing. For example, the below timeline editing as per Davinci Resolve, which is much more comprehensive and advanced.
So the bad news is, you can’t easily cut a video. You can do it though using the below guide.
How to trim a video on Windows Video Editor
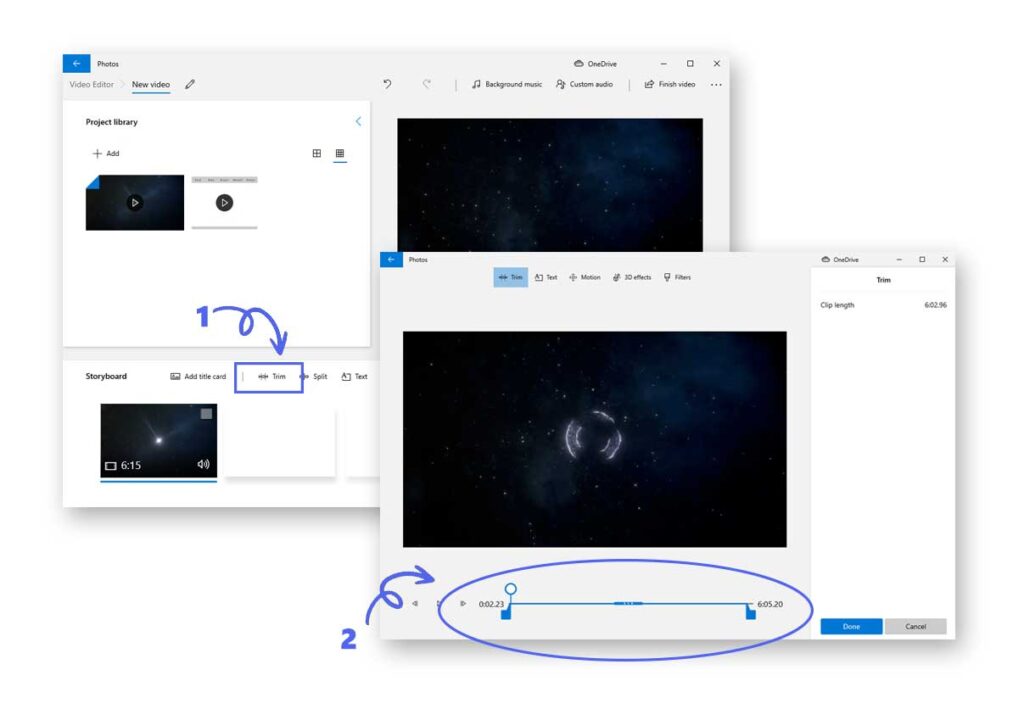
To trim a video in Windows where you remove the start or the ending of a video clip, follow this:
Open your video in the Windows video editor app.
If you have multiple video clips, drag the ones you wish to make your full video out of.
Select the individual clip in the storyboard.
Select the ‘trim’ icon in the storyboard.
In the popup, drag the start or end holders at the edges of the video progress bar to trim out the start or end of the video.
This will trim only the starting or ending of the video. You cannot trim or cut out any sections in between using the trim function shown.
How to split or cut a video in Windows into multiple parts
If you wish to split or cut a video clip into multiple parts, you do the following:
Open your video in the video editor app.
If you have multiple video clips, drag the ones you wish to make your full video out of.
Select the individual clip in the storyboard.
Now select the ‘split’ icon in the storyboard.
In the popup, you need to select a point in the video progress bar (timeline) at the point you want to split the video.
This will split your video into two parts.
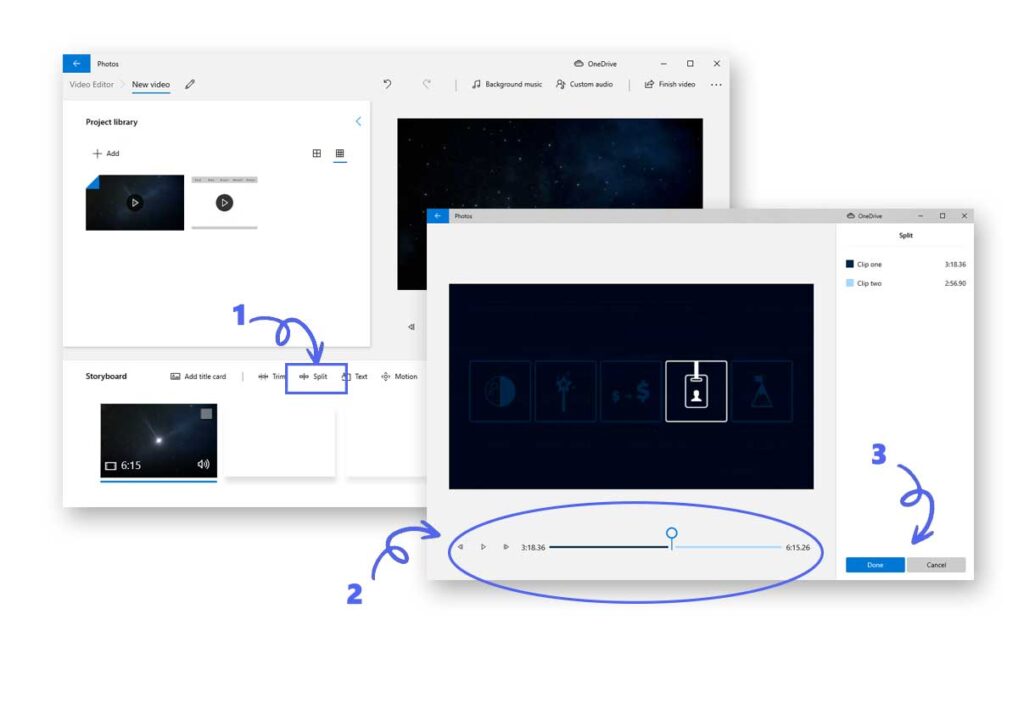
To split the same clip further, you need to save these two parts, then repeat the process for any individual parts you create.
Cut and Trim your video in one click with Imvidu. Edit videos using text.

How to cut out parts of a video in Windows Video Editor
If you’ve read the above, you know that you can ‘trim’ a video (start and end of a video length). You also know that you can split a video with a couple of clicks.
Unfortunately you cannot cut out sections or parts of a video clip in a couple of clicks. To cut out parts of a video.
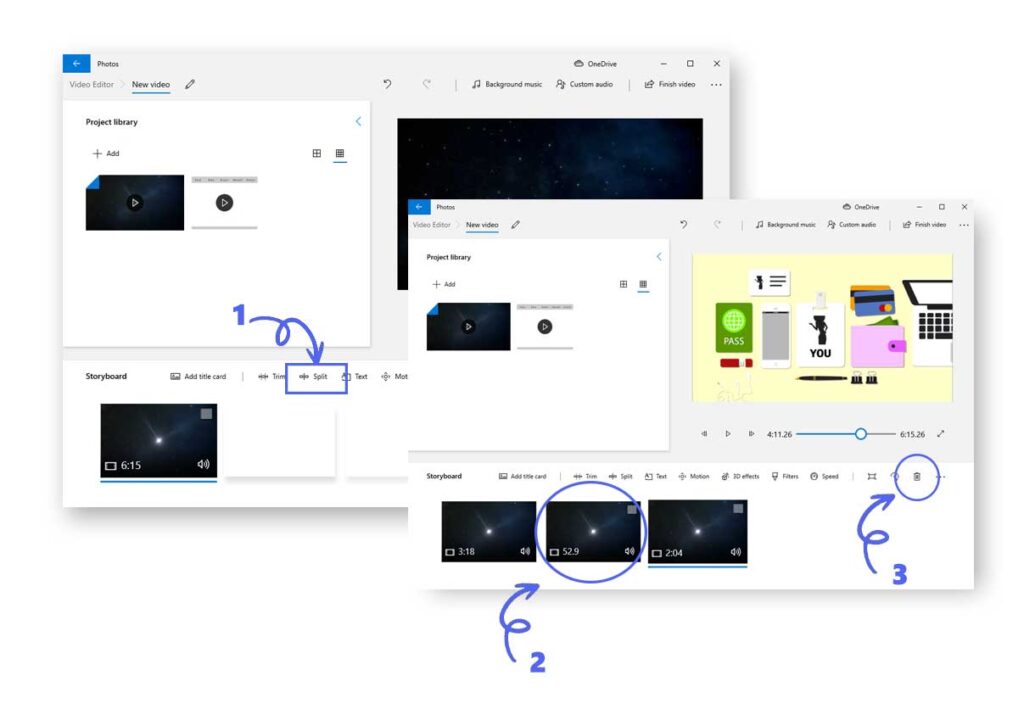
To do so you have to use split a bit more creatively. This is how you can cut out multiple parts of a video in Windows Video Editor (i.e. delete parts of a video):
Select the clip in the storyboard.
Click on the ‘split’ button.
Split the video where you want the cut to START from.
This will only split the video into two parts, but you will save this by clicking on Done.
You will have two clips in the storyboard now.
Select the second clip and click on the split icon again.
Select where you want the cut to END.
This will split your video into two parts again.
Click Done.
Now, you will have three video clips.
The middle clip is the one you want to delete and cut out.
So, select the middle clip and click on the Delete button.
That’s it, you’ve just cut out a part of the video!