In this article I’ll show you how to quickly crop your video in Davinci Resolve 17. Davinci Resolve is a powerful and professional video editor – but do you know what the best thing is? It’s free AND it’s feature-packed.
Unfortunately, it can be a little overwhelming for a new user given its complexity. So, I’ll show you a really simple way to quickly crop and resize your video project OR crop and resize individual video clips inside your project.
What’s the difference between crop and resize?
Cropping a video will cut off the edges of the videos so that the edges no longer appear in your final video output.
Resizing a video is exactly that, changing the size of your video clip for different screens or layouts. For example square, portrait, landscape or anything in between.
Cropping and resizing videos is useful now more than ever given the various social media sites and popularity of viewing videos on mobile phones.
By using both combinations of resize and crop, you can create different videos to suit YouTube, most sites, platforms or devices.
Want to crop videos online? Check out Imvidu.
Here are the following sizes accepted across these:

How to resize and crop videos in Davinci Resolve?
There are several (basic and advanced) ways to resizing your videos in Davinci Resolve. Given the complexity involved, we won’t go through all the methods.
Using Windows? Here’s how to crop videos in Windows Video Editor!
Instead, let’s assume you have a video you’ve recorded on your phone in landscape mode and you want to quickly publish it as a story mode video (i.e. vertical mode). Follow the following steps to crop and resize your video.
#1 Open Davinci Resolve and start a new project
Start a new project and optionally load your video file into the media pool. Drag the clip into the timeline.
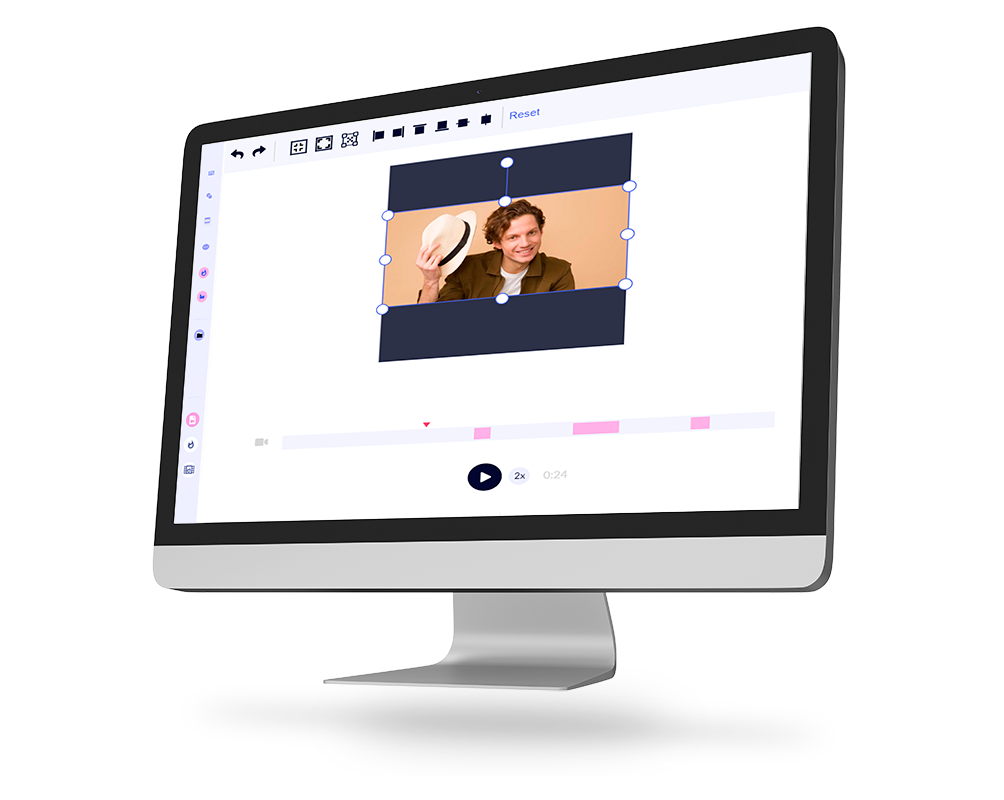
#2 Stay in the Cut Tab and Select Crop and Resize icon
While in the ‘Cut’ tab select the little icon in the top right hand side.
Here you can select from some standard presets. Select for example ‘portrait’. This will change your video into a vertical portrait mode. Or you can select Square which is very popular on sites like Facebook and LinkedIn.
#3 Create Custom Crop Size
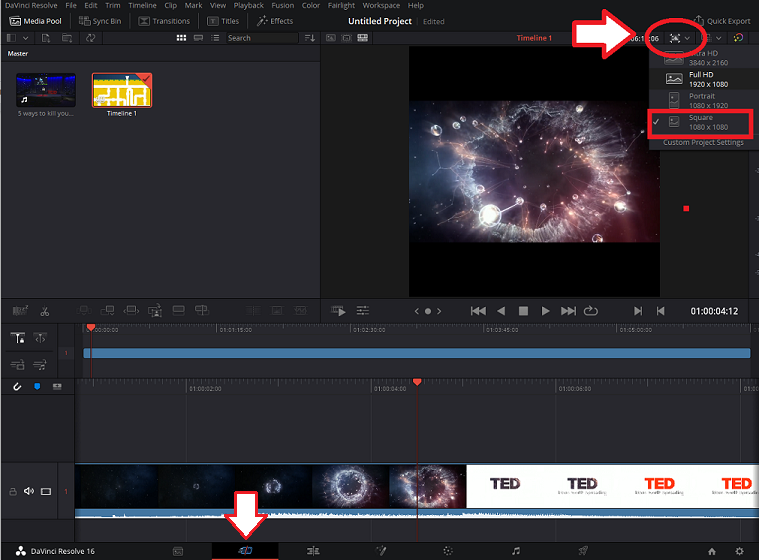
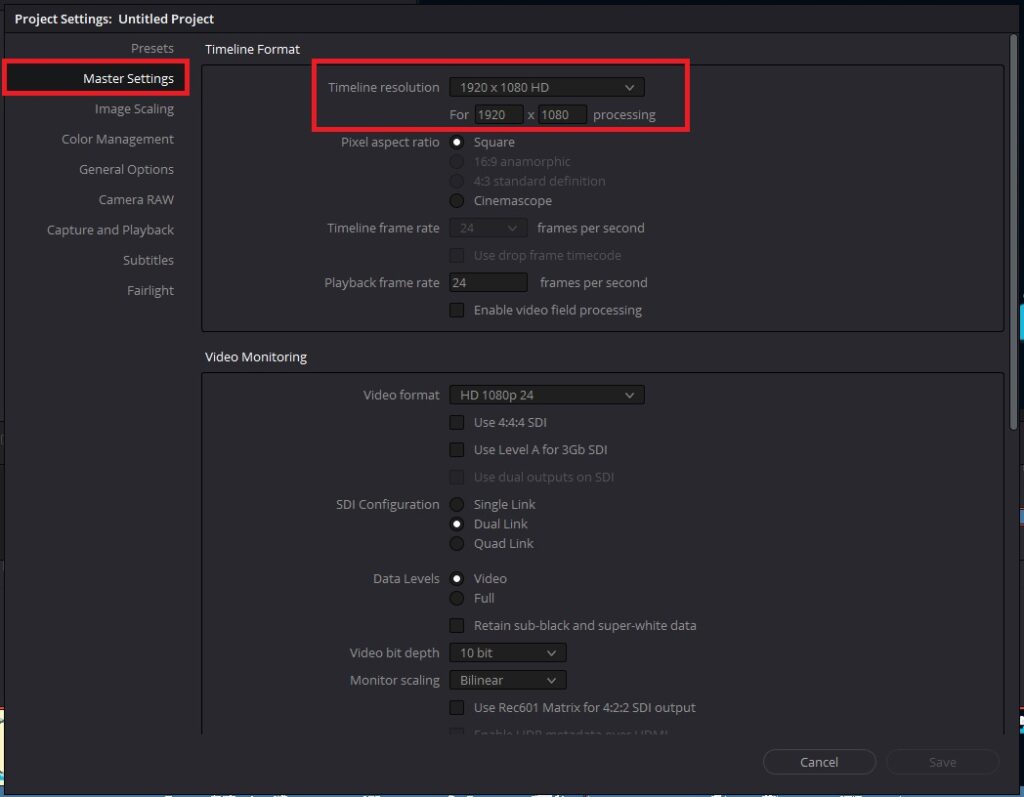
But you probably want to do a bit more with the video. Firstly though, you can make a custom video size as well. To that, instead of selecting any o the portrait or landscape modes in the drop down, select the ‘Custom Project Settings’ option instead.
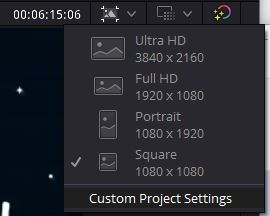
You can select from a variety of default sizes here as well and you should see a larger list of sizes to pick from. For a custom size you can also manually input it e.g. To do a square video type in 1080 x 1080.
#4 Change image scaling
You’ll notice the video size has changed. But it hasn’t ‘cropped’ the video. By default it probably reduced the actual video and put black bars across the top and bottom of the video!
Go back into the settings.
Go into the Image Scaling tab.
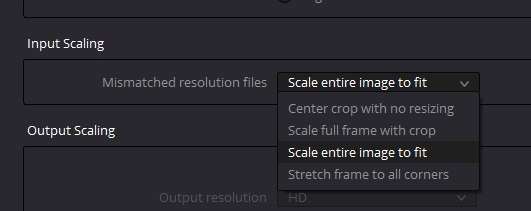
Under the Input Scaling you will see a drop down with several options. Here is what they mean:
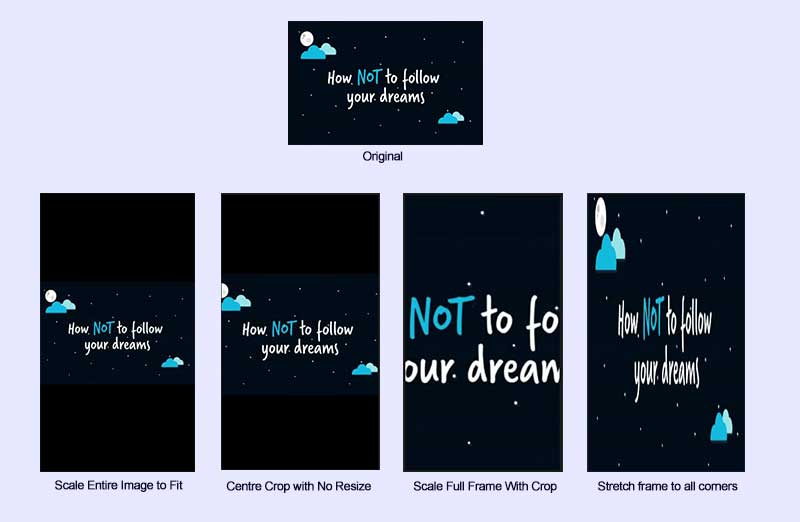
- Scale Entire Image to Fit
Will shrink your video to fit inside the frame size selected. In this case the black bars are visible more as the video is inside the frame completely. This doesn’t crop the video.
- Centre Crop with No Resizing
This will not shrink or enlarge the video, and it will keep the original aspect ratio of your video. It will crop the sides of your video. The black bars will still be visible in this example.
- Scale Full Frame with Crop
This will shrink or enlarge the video, keeping the original aspect ratio of your video. Your video should fill the frame size while cropping it a lot. Use this if you want to ‘fill’ your entire frame with your video.
- Stretch Frame to All Corners
This does not crop your video. It will change the aspect ratio of your video to fill the frame on all sides. This is most likely the least desired option.
If you want to crop your video and try and maximize how much of the video to show, then select either the Centre Crop With No Resizing (will show some black bars) or select Scale Full Frame with Crop so it fits the entire frame.
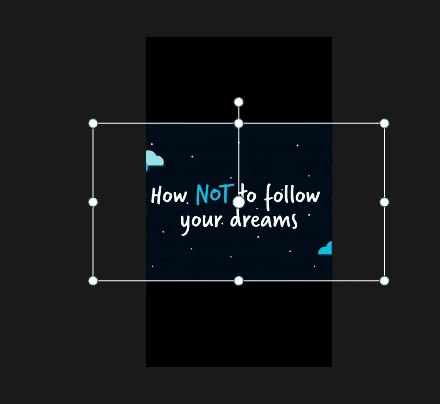
You don’t have to Scale Full Frame with Crop. The black bars can work in your favour as they can be used for adding text blocks, captions and other backgrounds to create a bigger visual impact – especially if cropping and posting videos on social media.
Here are a few cropped and resized video examples:

Cropping and Resizing Clips in Davinci Resolve
Another way that you can crop, resize and scale video clips is to enable transform control in the ‘Edit’ tab. This method is to customize each media clip separately.
You must follow the earlier steps to change the frame size (screen size) for your video before you can transform or crop your clips within or outside the frame.
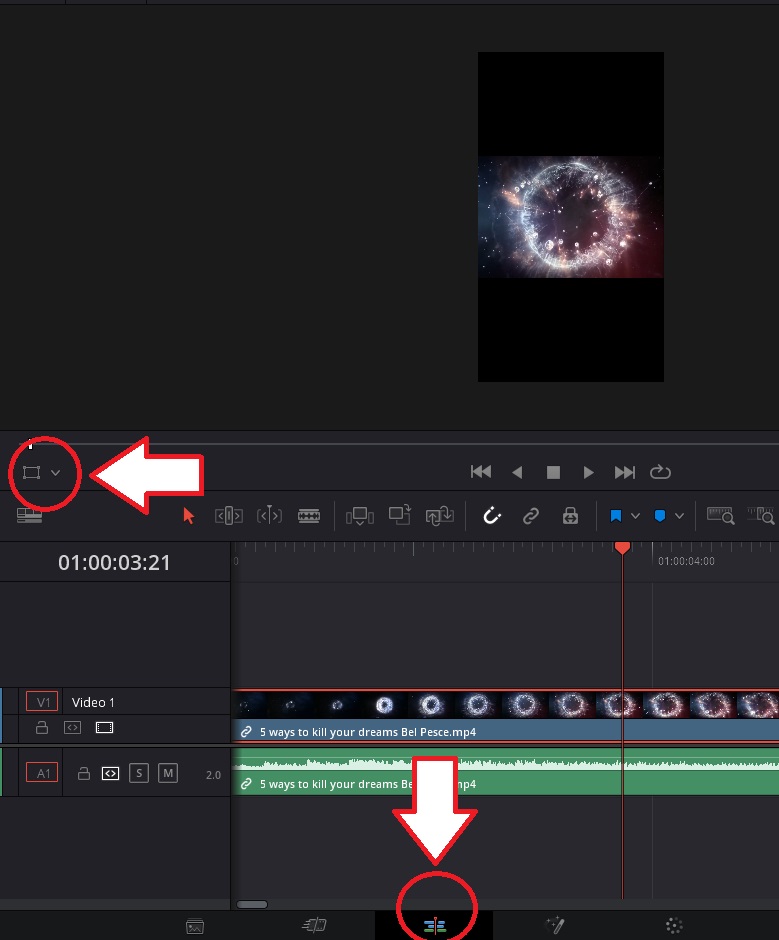
Once you’ve changed the frame size as shown above, Go to the ‘Edit’ tab.
Look above the timeline, click on the Transform icon or drop down to select Transform.
This will enable transform controls on your clip.
You can now zoom in, resize in any way you like.
TIP: Hold CNTRL on your keyboard while you drag the controls. This will maintain the aspect ratio of your clip.
Likewise, to crop a clip, instead of selecting Transform, select the Crop Option.
Once again, you can now crop video clip using the controls.
Crop and Resize your video in one click with Imvidu. Edit it using text.