In this tutorial, I’ll show you how to crop video in Premiere Pro quickly and easily. For a complete tutorial on resizing videos in Premiere Pro, read this guide here.
Otherwise, continue reading to find out how to crop a video. Cropping removes part of your visible video rather than ‘resizing’ the video clip.
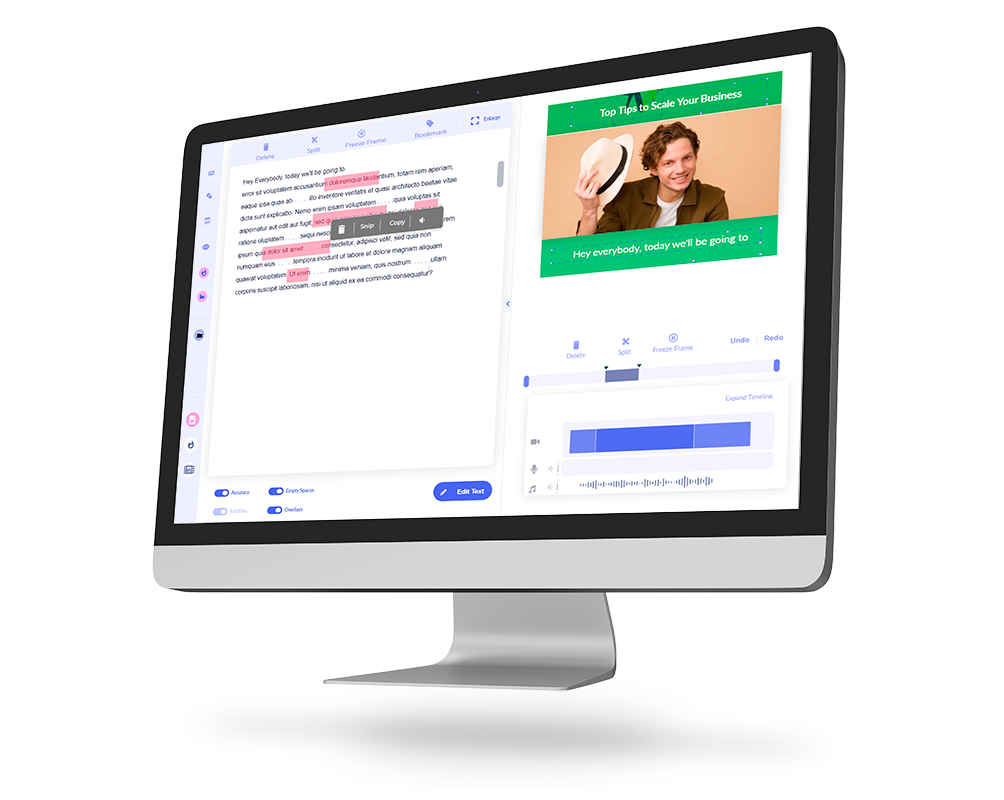
Want to crop videos without watermarks? Do it with Imvidu.
Crop video area but not the aspect ratio or size of the video.
So firstly import your video you want to crop into your project.
Firstly, let’s go through and crop your video in Premiere so it fits within the original aspect ratio of your video.
Firstly, there are several ways to crop a video, the following video shows you four ways to do so. I’ll walk you through a simple technique to crop videos outlined below.
So let’s say you have the following video, that you want to crop the top and the bottom to create a widescreen video.

You will use the same technique in Premiere to crop any image or video to any size and put it on top of another video or image.
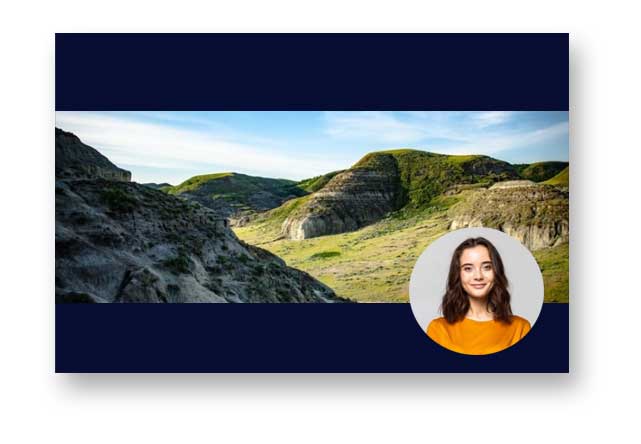
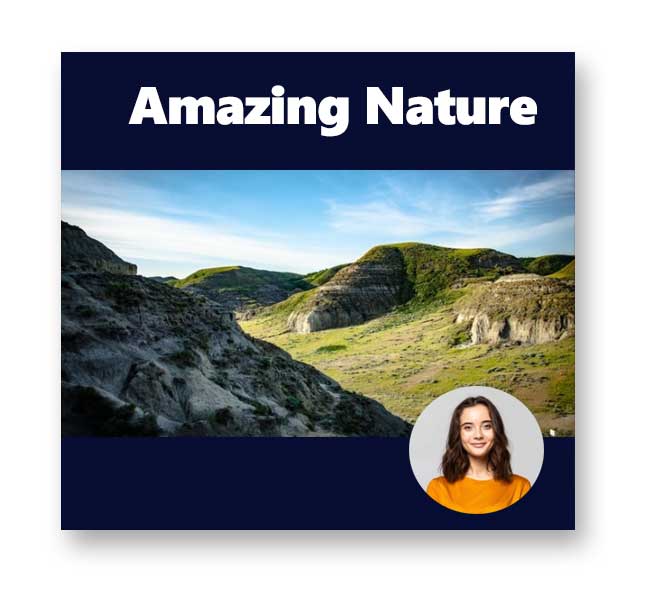
For example, you could crop a clip in your time line of a presenter and overlay that on top of the original as shown in the below example:
Let’s go through two methods that will let you do most of the cropping for most of your videos. We won’t go through any advanced cropping techniques in this tutorial.
Method #1 – Use Crop Effect
Assuming your have your project already open and video clips in your timeline.
Go to Effects and type in ‘Crop’.
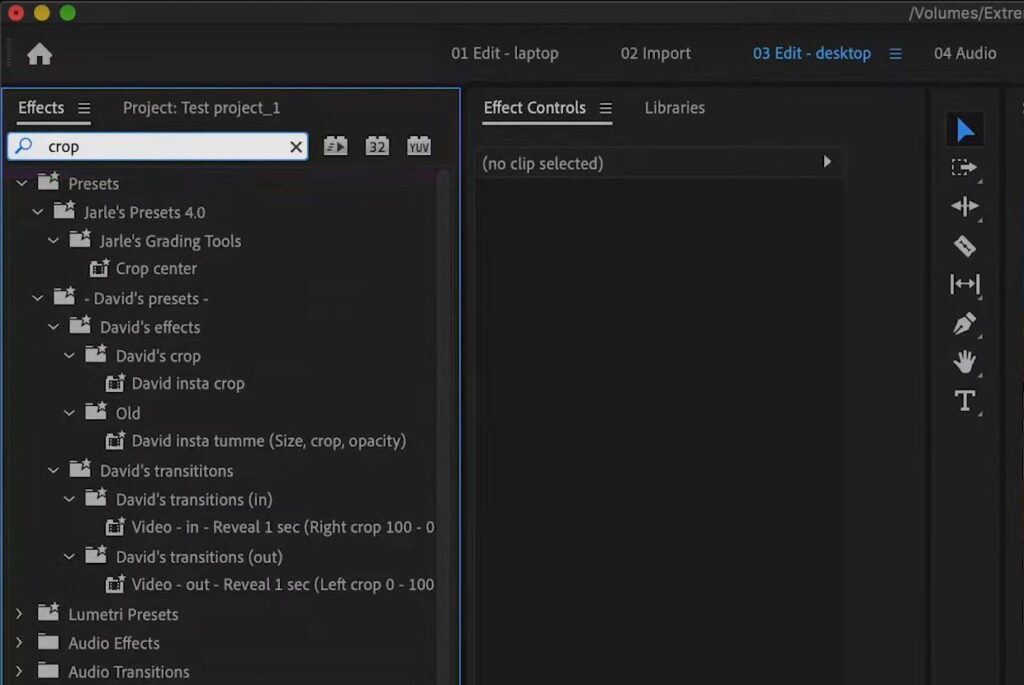
Drag and drop the effect onto your video clip in the timeline.
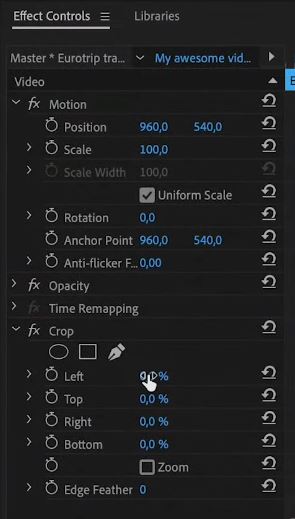
Then go to the effect controls.
You can now drag the left, right, top and bottom sliders to crop out the video clip.
Method #2 – Crop with Mask
Follow the same as above to setup your crop.
However now you can custom crop with any shape. The default mask shapes are Circle and Rectangle. Select either one, or you can create your own using the Pen.
Invert your selection.
Change the Opacity to 100%.
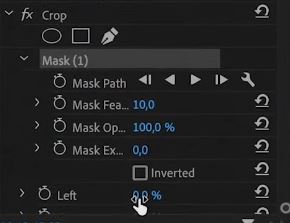
You’re Done!
Note: You can position a video underneath the cropped clip to show an overlay effect (video on video).
Crop video in Premiere as well as the Aspect Ratio
This method will be used to resize or crop so you can make vertical (portrait videos) or square videos. If you’re doing videos for social media and various platforms online (or for mobile phones), then this is the technique you will apply.
To do so, go into the Sequence then Sequence Settings.
Type in a desired frame size – both horizontal and vertical fields can be used.
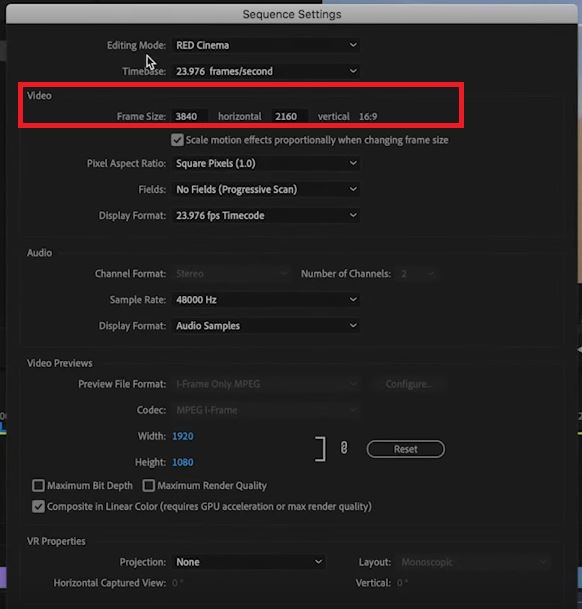
Your video frame size will change when you apply the changes.
Adjust and scale the video size within the frame by going into Effect Controls.
Adjust the position or scale as desired to fit your video into your frame.
You can now combine this with Crop or Crop with Mask technique for further adjustments to your video.
Read: Different ways to resize videos in Premiere Pro
Make a square video in Premiere Pro
Square videos in Premiere are easy to make and useful for social media! Videos for Facebook posts, LinkedIn feeds and standard Instagram posts (not Reels) look good when in square.
We’ll be using the above methods described to get the desired output. Square videos are just an example here, you can use the same method to make any size video! The technique to crop and resize is no different.
This is how to make a square video in Premiere Pro:
Go to Sequence > Sequence Settings.
In the Video section, change the Frame Size to 720 vertical by 720 horizontal (you can change this to anything based on the video quality. 720 is good for social media.
Click OK when done.
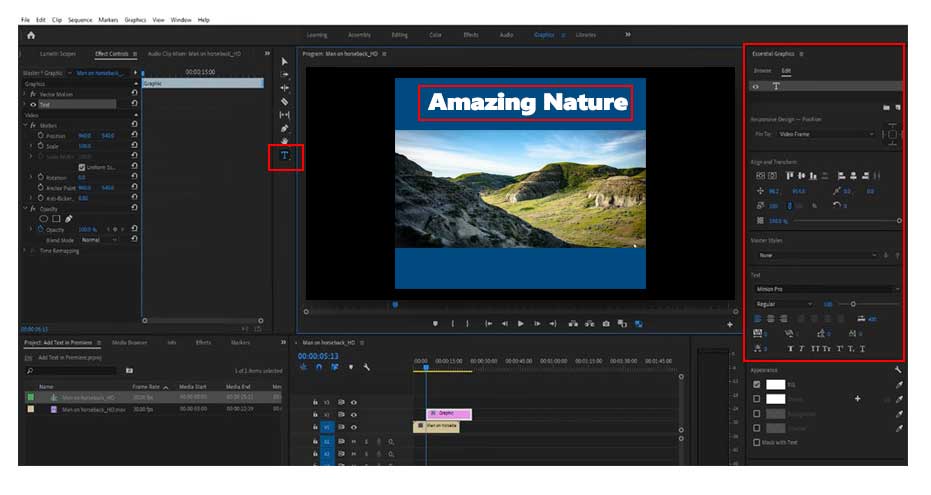
We want to style the video for social media. So we’ll add some text to the top.
First scale the video, so it fits inside the frame.
For simplicity, just go to Effects Control.
Change the Scale settings to fit the video clip inside your frame.
Change the background of your video.
Right click in the project area and select New Item.
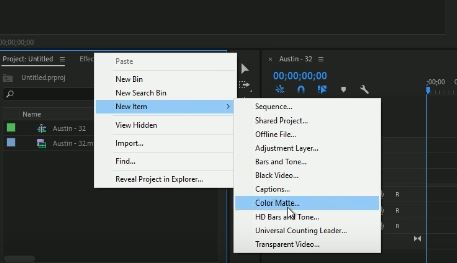
When the color picker opens up, select your desired background color.
The color matte will display in your Projects panel.
Drag and drop it in your Timeline.
Drag the background element along the timeline to let it display as long as you need, for example duration of the video.
Finally let’s add some text to spruce up the video. We’ll keep it simple and not go into too much detail on text styling. But for now, s
To add the text in Premiere:
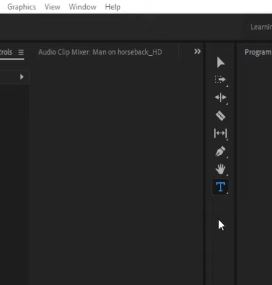
- Click on the T symbol in the pane next to your video
- In the video preview, select the point you wish to add the text
- On the right hand side you can then adjust the style of the text
- Adjust the font, color and position as required
… and you’re done! Export your video as you would normally!
Easily crop videos and do more for social media with Imvidu Studio.