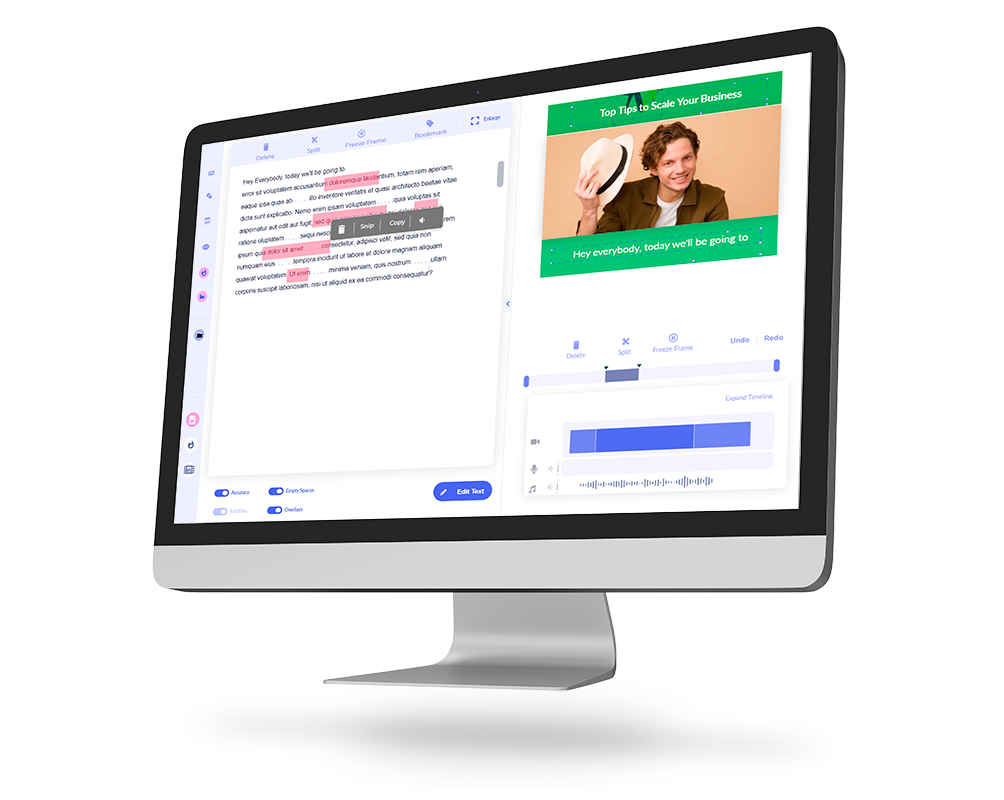
I’m going to teach you how to insert your own style of text into iMovie and animate it. Why would you want to do this? Because the title feature in iMovie is quite shabby and boring. So, I’m going to show you how to add any text you want to an iMovie project and have it pop into place with some animation.
To add custom text of any style you will need to use any image editing app and then overlay that in iMovie.
Learn: Did you know you can easily add text to videos online? Learn more.
You can use any image editing tool to do this, for example:
- Illustrator
- Photoshop
- Inkscape
- Canva (can use free version)
- Your favorite tool
However, we’ll be using Keynote though because it’s already on your Mac and it’s free. So, let’s get started!
How to add custom text in iMovie and animate it
Here is the TL;DR if you are familiar with Keynote and iMovie:
- Step #1: Create a slide in Keynote
Create a slide the size of your video and one text block to it
- Step #2: Create more slides for multiple text blocks
Create one slide per text block
- Step #3: Export your slides as transparent PNG images
Make sure to make the slide background transparent
- Step #4: Insert the PNG into your iMovie project
Make sure to insert as overlays on your video
- Step #5: Turn off crop and standard transition effects
Use the Crop and transition settings
- Step #6: Use Picture-in-picture mode and use key-frames
Add key-frames to animate your image
If you’re not familiar with doing these, then let’s go into the details!
Step #1: Create your text block in Keynote
When you’re in Keynote, select a custom size for your template. We’ll go with 16 by 9, the same ratio as widescreen video.
Also read: Learn how to resize your videos on a Mac
Pick a standard black template here and add a text block.
Add your text to the text box. Make the text box fill the template. Even if you don’t want the text to actually be this big in the video, you will still want to take up as much of this screen as possible.
Style the text according to what you want. Remember to change the:
- Typeface
- Font
- Size
- Color
Now, the important part!
Go into the background. So just outside of any element and under format you need to change the background for the slide layout for the document itself.
Change it so there is NO fill.
TIP
If you want multiple text blocks in your video, you can do them all in one keynote document. Duplicate or add more slides to add text blocks per slide.
Once you have your text and slides set as described, it’s time to export.
Make sure you set the export as PNG (which will retain transparency). Save the images to your files and folders.
Now it’s time to jump into iMovie.
Edit talking head and vlogs easier using text.
Step #2: Add the text in iMovie
I’m assuming you already have a project set up. Typically to add simple text you would use ‘titles’. However, we’re not going to do that.
Also read: Learn how to resize your videos in Imvidu
Instead you’ll import the images that you created in Keynote. Simply drag and drop the PNG on top of the video.
You don’t need to put it into the time line, you can overlay over the TOP of your video. In the timeline, it should also be placed on top of the video clip.
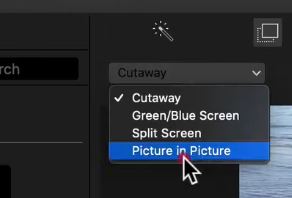
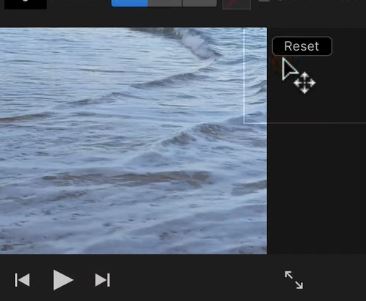
Select your text clip and click on the video overlay settings. Make sure the selection is Picture in Picture.
Change the transition to zero seconds. In this case it won’t fade (dissolve) in. Instead, it just appears.
Next click in the iMovie crop settings . It may be set to Ken Burns by default. If so, change it to fit. This will turn off all the cropping settings.
Go back to the overlay settings.
Stretch the image (or shrink it) by pulling the corners, so the text is the size you want it to be on top of the video.
Create the text animation
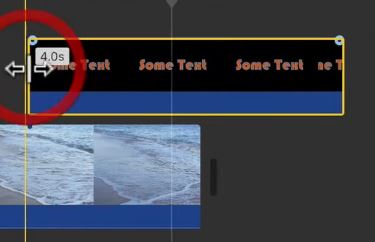
Now we’ll create a transition so the text slides in from the right.
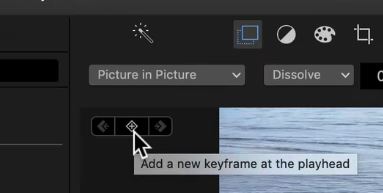
You’ll notice the two arrows with the little plus button inside of a diamond in the interface. You can actually add key-frames with this. Keyframes let you add animations inside of iMovie.
Place your cursor near the beginning of your text (overlay) clip (make sure to double click on the clip) in the timeline.
Now, in the video preview, drag the text off the video. This will be it’s starting starting position. For example, drag the text box just off to the right side of the screen. You should still be able to see the Box even though the text is not visible.
Back in the timeline, scrub (move) the play head further into the video.
Click on the ‘plus’ button again, to create another keyframe. Add drag your text block to where you want it to be in your video – for example in the center of your video.

If you play back your video, you’ll notice how the text block slides in from the right.
Let’s transition the text block out.
To do so, move the play head forward in the timeline but a few seconds before the end of the clip.
Add another keyframe.
Don’t change the position of the text box, because you want it to remain there until the video plays upto this point.
The transition out will start from here.
Go to the end of your text overlay clip in the timeline, place one more keyframe.
Also, drag your text block off to the right so it’s off screen again.
You should have FOUR key frames all in all if you followed this example.
So that’s it. If you play your video back it will slide in, remain there until towards the end of the clip, then slide out again.
Get creative with adding text in iMovie
So as you learnt keyframes are powerful little things that you can use to animate your images. In this case our text overlay was an image.
The above example was a simple slide in and slide out. However, you can set more keyframes in between and create more layouts of your image. You can resize it or rotate it for example at each keyframe.
So that when you play your video back, it will animate your image to the next keyframe.