In this guide, we’re going to talk about editing! Whether you’re an amateur, a hobbyist, or a professional, editing is an art that you need to learn. Why? Because editing is the process that takes your production, from the perfectly lit shots to the awful shots, and turns them into masterpieces.
Editing brings your narrative to life, turning it into an actual story that users can really engage with. Regardless of the types of videos you intend to produce – documentaries, movies and dramas,. In fact, you can turn talking head videos, presentations, interviews and vlogs into an experience, all through the art of video editing.
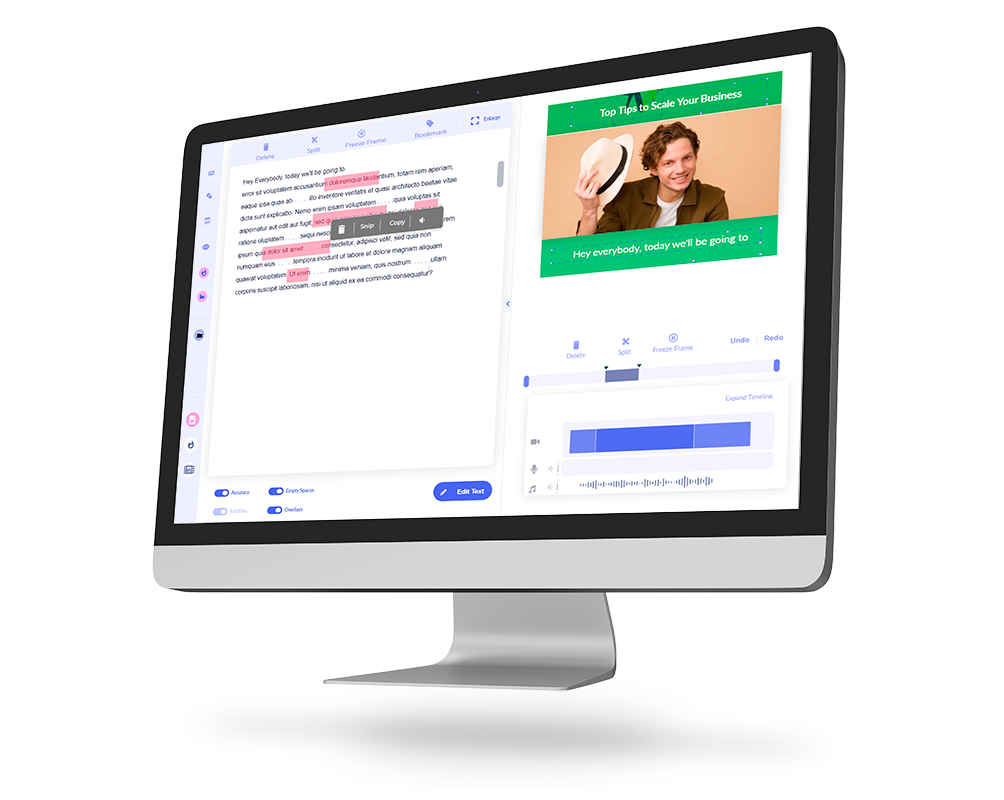
Learn: Use the online video cutter to trim or cut videos for social easily
So in this guide, we’ll go through 9 cuts that you must learn, try and experiment with so you can create some weird, amazing, and original content! Any one of the cuts that you use can help you express your story, add weight or meaning to every scene.
#1 Standard Shot
First things first. Let’s kick it off with the basics. It’s going to be your standard shot. Now. This is exactly what it sounds like. It’s going to be the end of one scene in the start of another. It’s just putting two clips together. You don’t need any other transitions, keeping it raw works just as well.
Other Guides You May Find Interesting:
#2 Jump Cut
What is a Jump Cut?
As the name suggests, it is a cut that ‘jumps’ around a scene with the intent of speeding up time. You’ll usually see these shots where the camera is stationary, but the subject in the scene ‘jumps’ around.
It’s a nice way to show either passing of time – whether over short periods of time – for example, someone cooking on camera or a driving scene where the camera is focused on the driver.
A jump cut can also be used to create chaos or match the scene to the rhythm of background music.
VLoggers and YouTubers usually use this cut to clean up dead air, filler words and ‘umms’ or ‘errs’. With audience attention spans decreasing due to social media, the jump cut is an awesome method for keeping the audience engaged, while removing any unwanted parts of your video.
Do Jump cuts, remove dead air in a few clicks with Imvidu. Edit videos using text.
#3 The J cut
What is the J-Cut?
So you’ve probably seen the J-Cut without realizing it. It’s a simple cut that lead is into the next scene with the audio, as shown below:
To do the J-Cut on an NLE Timeline (e.g. Premiere or Resolve), you just drag the audio clip from the next clip over on top of your current clip OR extend the video track over the next but not the audio.

The J-Cut is a great segway into the next scene that changes locations while letting the audience know what’s about to happen.
#4 The L-Cut
The L cut is similar to the J cut but the audio/video scenario is flipped. Unlike the J-Cut, the L-Cut leads the audio into the next shot scene.
The L cut is almost essential for conversational scenes, interviews and video podcasts where you have multiple speakers. Unlike the J-cut which does a clean cut, this one provides a seg-way into the next scene or the next speaker (subject).

As an example, in a conversation the L-Cut will show one of the subjects saying something, and then you’re going to cut to the other character, as that first character is still talking. This may be really useful to capture the reaction of the listeners.
#5 Cutting on action (matching action)
This is one of the most common cuts that film school teaches and is basically exactly as it sounds. You’re going to cut when the subject moves a certain way, for example a punch or a kick, or even something as simple as a head-turning, or standing up to move. The cut allows the audience’s eyes to stay on the action as it plays out throughout the scene.
In short, cutting on action or matching on action cuts from one shot to another view that matches the first shot’s action. Combined two different shots complete the action. It provides the viewer with the impression of a continuous time scene.
A common example is a man walking up to a door and reaching for the knob. Just as his hand touches the knob, the scene cuts to a shot of the door opening from the other side.
“Although the two shots may have actually been shot hours apart from each other, cutting on action gives the impression of continuous time when watching the edited film. By having a subject begin an action in one shot and carry it through to completion in the next, the editor creates a visual bridge, which distracts the viewer from noticing the cut or noticing any slight continuity error between the two shots.” Wikipedia
#6 Cross-cutting
Cross cutting, also known as parallel editing.
“Cross cutting in film is an editing technique that cuts separate actions together to illustrate moments that take place simultaneously within the narrative structure. The “rules” of cross cutting as far as their relation to scale and time are not overly strict, but the majority of cross cuts are used to show large scale events that occur across multiple locations.
The distance of these separate locations could be rather short, for example in the same building, or can be as far as completely different planets. The main idea is to show the viewer multiple views across different locations.” –
Studio Binder
The Cross Cut a great way to build suspense, having two narratives play out at the same time. The simplest example is of two characters talking on the phone and are in different locations. The Cross Cut bridges the conversation together.
#7 Montage
What is a Montage Cut?
The Montage is more for the sequences rather than the scene. A montage can be the use of B-roll, character shots, location shots etc. that cut into the scene over an extended period of time in different locations.
The Montage is very common in v-logs, travel or cooking guides, sports movies, training, or any type of scene where the character needs to get ready for some objective. Think of the Rocky films, montage cuts are perfect to show character development.
#8 Smash Cut
What is a smash cut?
A smash cut is where one scene abruptly cuts to another for aesthetic, narrative, or emotional purpose. The smash cut usually occurs at a crucial moment in a scene where a cut would not be expected and a disparity exists in the type of scene on either side of the cut.
For example, going from a fast-paced frenzied scene to a peaceful one, or going from a pleasant scene to a chaotic one.
Smash cuts can be used in thriller and horror movies often, for example a character wakes up from a nightmare. You can replicate the intensity of a thriller scene to create other engaging stories.
before the blade pierces the skin, the scene is suddenly replaced with a non-violent use of a cutting edge, such as the chopping of vegetables.
#9 Match cut
What is a Match Cut?
These are really impressive cuts in film making that immerse the viewer into your story. The match cut as the name suggests matches the character’s action, subject or object into the next scene.
So, it melds two elements or environments to create a seamless cut. This follows into the next frame creating a fluid motion.
Stanley Kubrick‘s 1968 film 2001: A Space Odyssey contains a famous example of a match cut. In the example, an ape throws a bone into the air – using it as a weapon. As the bone spins in the air, there is a match cut to a much more advanced tool: an orbiting satellite
So, there you have it – 9 cuts you can use to create weird and wonderful videos. These aren’t just used by professionals. If you’re trying to really engage your users through your videos then you should be trying these out. Even if you’re doing vlogs or simple video podcasts!