Have you ever wanted to add subtitles in iMovie for your videos on a Mac but didn’t know how? This article will walk you through multiple ways on exactly how you can add subtitles in iMovie.
Adding subtitles is a great way to reach your audience in languages they may not understand. It’s also a good way to make sure people with hearing impairments can follow along.
Luckily, adding subtitles is easy and (sort of) can be done in iMovie for Mac.
In this blog post, we will cover everything from how to select a language and a font style to adding text and previewing it on the screen. Let’s get started!
- What are subtitles in iMovie and how do they work?
- Can you add subtitles in iMovie?
- Why put subtitles in iMovie?
- Why bother adding subtitles?
- How to add subtitles in iMovie using a MAC?
- How can I add subtitles to a movie in iMovie using an iOS device, such as an iPhone or an iPad?
- In iMovie, can you add a background to subtitles?
- Should you use iMovie to add subtitles?
- Tips for the best subtitle placement: Subtitle Guidelines
What are subtitles in iMovie and how do they work?
Subtitles allow viewers to watch a video without hearing the audio, allowing them to still fully appreciate the content.
It is also possible to use subtitles for other purposes, such as introductions, credits, or describing the context of what is being presented on the screen. A lot of professionals use subtitles to add impact to videos.
Let’s say you ever find yourself in the position of needing to subtitle a movie on your Mac or any iOS devices; you might be looking for a subtitle in another language, for narration, or for tutorial instructions.
iMovie is a Mac application tool that may be used to perform basic video and movie editing tasks.
Can you add subtitles in iMovie?
iMovie does not let you add subtitles to your videos. There is no specific feature in iMovie that will let you ‘add subtitles’, create timestamps, import or export subtitles in iMovie.
There are however two hacks you can use:
One, you may still add subtitles to videos by using the title option. This means using a manual technique to adding subtitles.
Two, if you want to automatically add subtitles then you can use an automatic subtitle generator instead of adding it to your video in iMovie.
Why put subtitles in iMovie?
You should consider adding subtitles using this tool for the following reasons:
- Your video is on a mac and you’ve spent time editing it in iMovie.
- You’re happy to use titles in lieu of subtitles.
- Your video is short.
If you want a simpler way, simply login to studio.imvidu.com and you’ll be able to add subtitles more easily.
Why bother adding subtitles?
75% of videos on social media are watched on mute! This is one particular reason is usually sufficient to be adding subtitles. You can actually get more views, more engagement by simply adding subtitles.
In order to make your information accessible to people speaking a variety of languages and coming from different countries. For example, you may be required to translate a YouTube video whose original language is German into another language, or English to another language.
To increase the amount of time people spend watching your advertising films on your website or social media. Subtitles are, without a doubt, necessary for videos that are not audible and to increase the impact of your message.
To make your video accessible to persons who are deaf or hard of hearing. People tend to overlook this, although this demographic can account for nearly 20% of all web visitors at times.
To quickly and easily add credits or signals at the end of your short video or movie.
How to add subtitles in iMovie using a MAC?
Even though iMovie doesn’t have the specific features that let you add subtitles to videos, there is a simple method of getting the same outcome:
Step 1
When you open the timeline, you can quickly see all of the videos and choose which one to watch first if there are several.
Make certain that you have identified the particular areas of the movie in which subtitles will be added before proceeding.
Always keep in mind that it is not possible to have subtitles placed in every part of the movie, but only in specific sections. That is the option from which you will have to choose.
Step 2
Place the cursor in each of these areas one by one, then select “edit” from the drop-down menu, which will provide the option to “split video clip at playhead.” At this stage, you will be able to make a decision on the subtitles that you want to use.
Select “titles” from the drop-down menu that appears after clicking on the “editing” icon.
You will be presented with a vast list of options; choose “subtitles” because that is your primary concern.
Step 3
By hovering the cursor over the word “subtitles,” you will be presented with two alternatives to choose from: subtitle and stripe subtitles.
With the exception of the last one, there is no significant difference between the two other than a stripe that will show right below the text.
Step 4
Feel free to select either of the two and have it professionally personalized so that it appears to be the greatest.
Colors, fonts, lines, and size are all customizable elements that you will not be able to ignore while creating your design.
Similarly, you can pick whether your subtitles will be displayed over black or over video, which simply defines how the subtitles will appear on the screen when they are displayed.
Continue to edit your video in iMovie by adding the subtitles you’ve chosen.
Step 5
To begin, click on the first section of text that you want subtitles to appear in. A window will open to allow you to enter in the exact words you wish to include, following which you will click “add,” and the subtitle will be successfully added to your video.
This step should be repeated in all of the areas that you previously identified as being acceptable for subtitles.
Even if there are a large number of them and the movie is lengthy, it will almost certainly take a long time to complete, so be patient.
Step 6
If you make a tiny mistake while adding subtitles, you do not have to start over from the beginning.
You will need to click on the clip at the exact point where you want to put the subtitle in order for the editing option to appear on the left side of the screen.
To save your modifications, click on the “update” button.
How can I add subtitles to a movie in iMovie using an iOS device, such as an iPhone or an iPad?
Step 1 – open iMovie and create or pick an existing project
On your iPhone or iPad, open the iMovie app and begin editing. Following that, you should import the video clip to which you want to add subtitles. You should pick projects from the drop-down menu and then select the video to which you wish to add captions.
Step 2 – Use the text tool to add subtitles
To complete this stage, you’ll need to use the Text tool. To access it, click on the icon at the bottom of the screen.
Depending on your preference, either the captions should show in the center of the video or photo or at the bottom of the video or photo. You can also choose the style of the captions.
Step 3 – Edit the text on the timeline
Once the video has loaded, scroll down the timeline until you reach the section where you want to insert subtitles.
Select that point in the timeline by tapping on it. At the bottom of the screen, there will be five icons to choose from.
Because you will be adding text, you should select the T icon from the toolbar.
Step 4 – Edit the text style
Following that, you should select a text style from the drop-down menu.
Once you’ve done so, a sample of the text will appear on your video. You can then choose where you want the caption to appear on the screen by selecting the Lower and Center choices.
Step 5 – Edit the duration of subtitles
When you tap on the text box on the screen, the keyboard will appear on the screen. Begin typing the content for your caption in the text box. When you’re finished, click Done.
The Scissors icon may be found at the bottom of the timeline, and it can be used to shorten its duration.
After that, click on the Split option to separate the files. If you rewind to the beginning of the video and start scrolling towards the finish, you will notice that the caption terminates where you tapped the Split button at the beginning of the film.
What is the best way to update the text style?
You can also modify the text style in iMovie, which is a feature of the subtitle editing process.
The color, font, style, and even the alignment of your subtitles are all completely customizable.
All you have to do is click on the title clip in your timeline and then on the title setting symbol at the top of your viewer to complete the process.
After you’ve done so, all of the options for adjusting the title bar on your viewer will be displayed, and you may select the one you want from the list.
Adjusting the duration
There are a couple of different ways to adjust the length of the text that shows on the screen. To edit the title clip, select it in the Timeline and then choose one of the options listed.
To lengthen or shorten an edge, drag it along the screen. You’ll notice a difference in the duration as you do this.
Click on the Clip Information (small letter I button above the Viewer and type a number of seconds in the Duration Field to save the clip.
Is it possible to add subtitles using SRT file in iMovie?
No, you will not be able to directly load an SRT file into iMovie for automated subtitles.
The closest thing you will get is to copy the text from the SRT file and paste it into the text field, which is far faster than typing directly into the text box…. errr depending on your typing speed!
Also remember the the subtitles don’t act how subtitles would if an SRT file accompanies the video. Usually viewers are able to ‘turn off’ the subtitles in that case.
In this case, the subtitle text is layer over your existing video and become part of the video. Viewers can’t turn these off.
So, although this will have no effect on your movie, your audience will see exactly the same thing as they would have seen if you had included the conventional subtitles. The only thing that will prevent them from doing so is turning them off.
In iMovie, can you add a background to subtitles?
Subtitles may be made more visible and simpler to read in iMovie through the use of a few different settings.
You have the ability to customize the font, size, and color of the subtitles.
You can also choose to surround the text with a black border. These alternatives, however, are not always sufficient to meet the needs of the individual.
The best approach for creating perfect separation between subtitles and footage is to add a black backdrop to the subtitles. This is not something that is possible in iMovie.
Should you use iMovie to add subtitles?
As mentioned earlier, iMovie provides a basic set of tools that allow you to add subtitles – which are essentially just titles (text overlays). There are better ways to automatically add subtitles these days, so if you’re doing more than one video or if your video is long, I’d urge you to look at something else.
Using an automatic subtitle generator gives you a few benefits:
- convert video into text
- export SRT files
- export subtitles with our without timestamps
- generate complete transcripts that can be exported and used elsewhere
- style subtitles in a few clicks
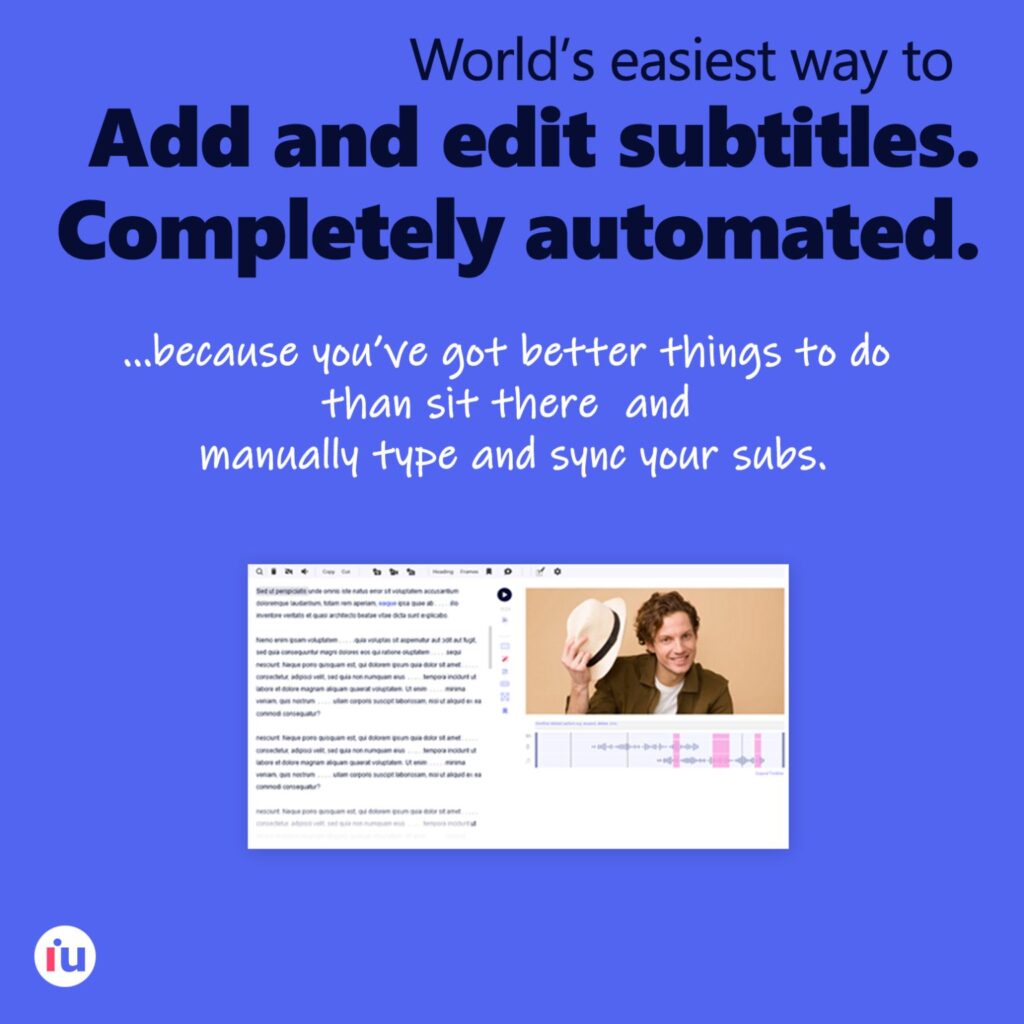
Add and edit subtitles to your videos. Fast.
Simple as editing a word document.
* Like it or hate it, this call-to-action is a shameless plug of our own tool. Seriously though, you should try it out at least.
Tips for the best subtitle placement: Subtitle Guidelines
Sound is powerful:
- When speech is inaudible, place a label on the wall explaining the situation, for example (cat purring)
- Sound effect captions can be displayed in lowercase italics within brackets, for example, (child whispering)
- Alternatively, if there are numerous individuals speaking, or if the video transitions between different persons speaking, consider utilizing the names of the people who are speaking to identify the different speakers in the subtitles, for example, (Larry) What did you have to say? (Liza) This is great, in my opinion.
Meaning is everything:
- When translating from another language, remember to translate meaning rather than just words, and make sure to convey the intended message to the audience.
- When feasible, quotes from public personalities should be captioned exactly as they were said word for word.
- But, “so” and other words that are necessary for conveying meaning should be kept in the sentence as well.
- You should make sure all real words are captioned, regardless of whether they are spoken in a foreign language, dialect, or slang.
Timing is the key:
- Subtitles should show and disappear exactly at the same time as the words are spoken on the screen. Make certain, however, that captions remain visible on the screen for a sufficient amount of time to be read.
- There should be no more than two lines of text displayed on the screen at a time. To accommodate very brief dialogue (for example, “Okay” as an answer to a question), set the minimum time of display to 1.5 seconds. These bare minimums do not apply in all situations involving rapid speech.
- It’s best to think about whether or not the audience will be able to read through your subtitles while still following the events of the video before you start writing.
- If a line is repeated, leave a gap between the finish of the first repeated lyric and the beginning of the second repeated lyric to give the song some breathing room. This guarantees that there is a visual ‘blink’ on and off between each line, indicating to the observer that the phrase has been sung twice.
- Use a distinct subtitle for each sentence of dialogue in the dialogue. If possible, avoid concluding a sentence and starting a new sentence on the same line, unless the second sentence is really brief.