There are a couple of ways of adding subtitles to your videos to your projects in Davinci Resolve 17.
First Method – Manually add subtitle track
Second Method – Auto generate and add to track (add subtitles automatically with Imvidu)
#1 Manually add subtitle tracks
Assuming you’re in your project and in the Edit tab.
Right click in the timeline and select ‘Add Subtitle Track‘.
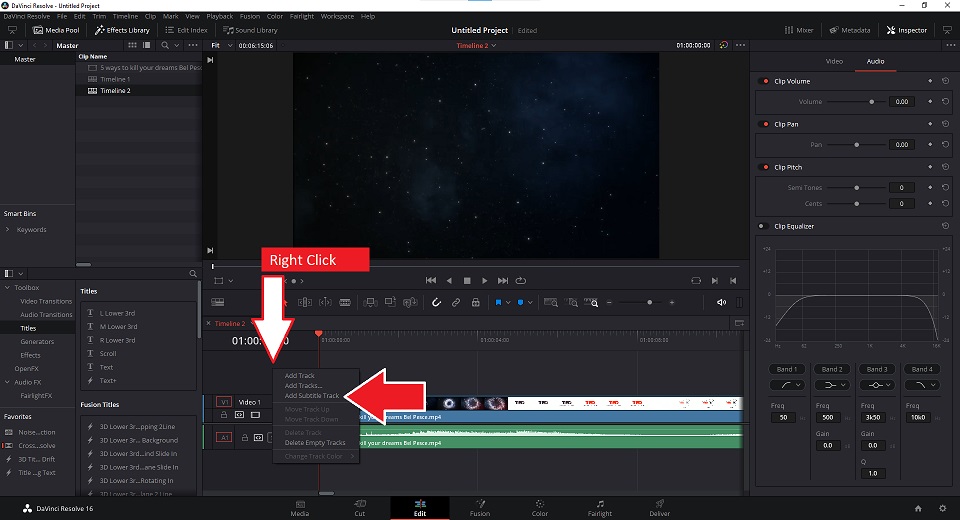
This will add a new track in the timeline. You will add your captions to this track.
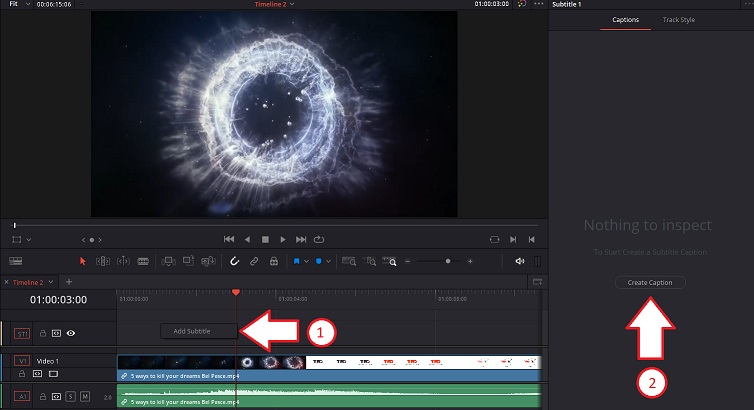
To start adding your first caption you can once again right click on the actual track anywhere you want to place your first caption – see image below option 1.
If you have the Subtitle Track selected you should see a right hand side pane, you can also click on ‘Create Caption’ to create your first caption – see image below option 2.
Once you have added the first caption you will add your caption by typing it into the text box in the right hand side caption pane. You can see in the below image I’ve added two captions.
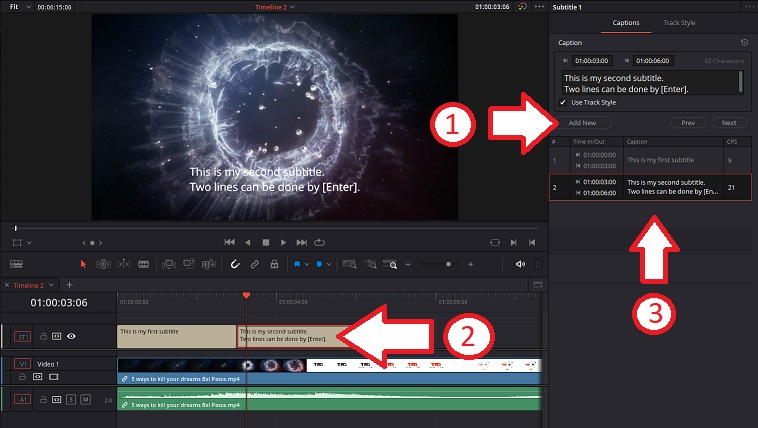
#1 – Click ‘Add New’ to continuing adding captions.
#2 – Shows the caption adding to the track
#3 – Shows the Time in/out and the caption itself
To do a multi-line subtitle just press [ENTER] and type your caption on the next line. Of course, you can change the display length of the caption as you would with any other element in Resolve. Drag the edge of the block in the timeline. You can also drag the caption along the time line to change both the start and end time together.
Add and edit subtitles to your videos. Fast.
Simple as editing a word document.
* Like it or hate it, this call-to-action is a shameless plug of our own tool. Seriously though, you should try it out at least.
Now the tricky part! Especially if you have a lot of audio to convert to text. Depending on your style, you can do one of two things:
- Add all blank caption blocks first, by default it will add a 3 second block, or
- Add new caption fields as you type out the text and adjust each block as you go
TIP: For videos that have continuous dialogue, I suggest adding several empty caption blocks, then go back and start typing away.
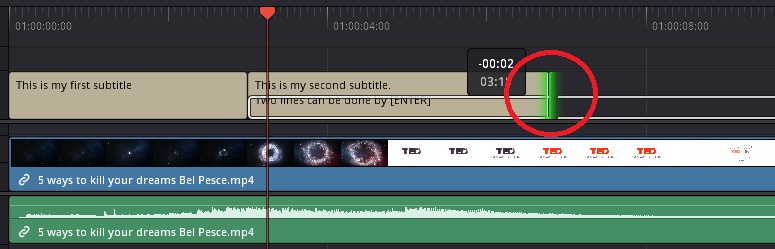
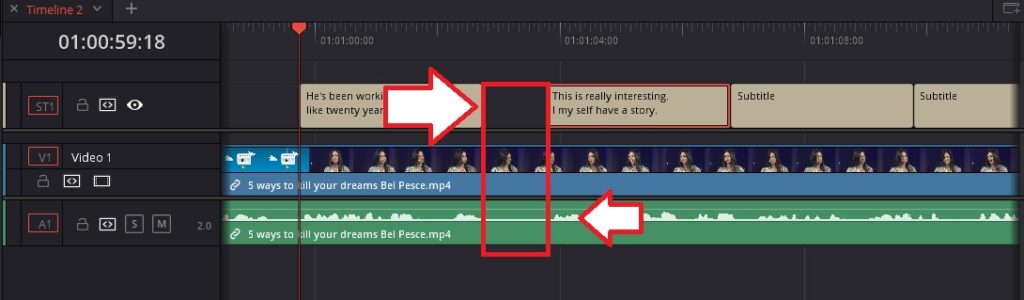
It’s best to start your caption right at the end of the pause. See below image. You can see the second caption in the image is added as soon as the pause in the audio ends.
TIP: Align your start and stop times to pauses in the actual speech/dialogue as per below image.
Style subtitles in Davinci Resolve
To style your subtitles, make sure the subtitle track is still active (selected) and select ‘track style’ in the subtitle pane on the right hand side – see #1 in the image below.
Here you can configure the position and size of the captions, as well as the colors, backgrounds and any effects – see #2 in the image below.

Make sure the subtitle text doesn’t blend into your background. I prefer to either add a drip shadow or some sort of background color behind the font.
#2 Automatically add subtitles to Davinci Resolve
So we just went through the manual way of doing it. As you can imagine it’s a bit tricky, time consuming and tedious.
At the time of writing this article Davinci Resolve doesn’t come with it’s own text speech to text. So that’s one reason we use Imvidu Online Studio to generate a subtitles file instead. Let’s go through and see how you can save hours:
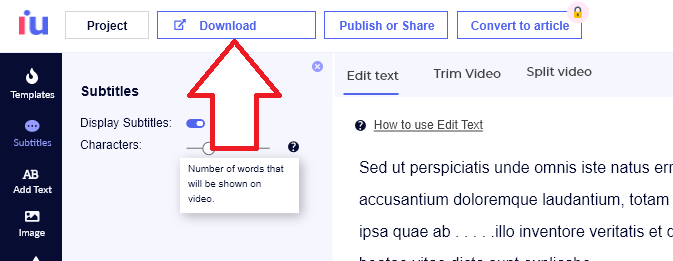
TIP: Click on the ‘subtitle’ button to open up styling options. Change the character limit to change the length of the captions shown.
You can actually style your video as well in Imvidu if you like OR if you do want to bring the subtitles into Davinci Resolve, you can export the subtitle file and add to Resolve.
Adding the Subtitles File to Davinci Resolve
- Click on Download (or Export)
- Click on Prepare Download
- Select the SRT text file option
- Download it to your desktop once the file is ready
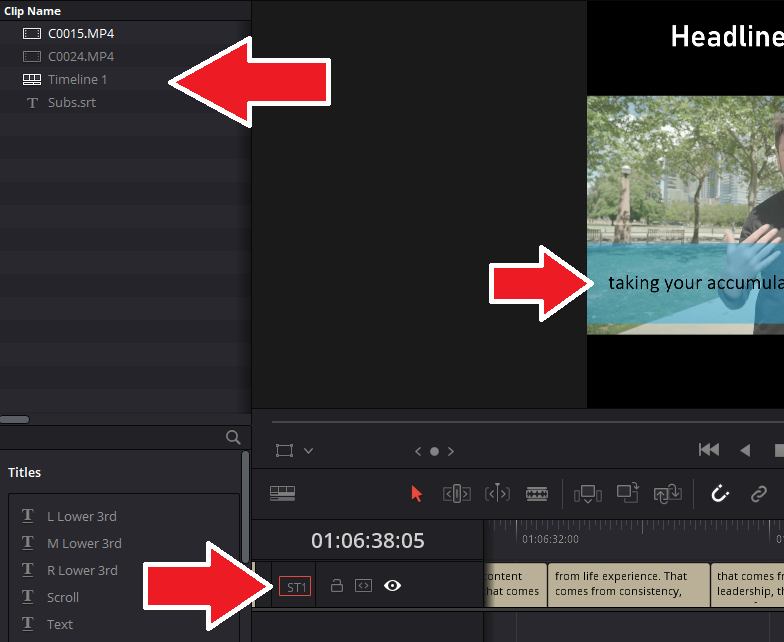
Once your file is downloaded, all you need to do is drop it into your project and add to the subtitle track.
You can see an example of the Subs.srt in the image below. Drag and drop this into the Subtitle track and style as you would normally.
You will notice that the subtitles are synced to your audio automatically, including any pauses.
TIP: It’s usually a good idea to add your subtitles near the end of the production process.
Pros of using Imvidu Studio to Generate Subtitles
Don’t just add subtitles to videos. Do more with them.