How To Add Subtitles To Video
Step 1. Upload your video into the subtitle generator
Add Subtitles to Videos such as Mp4, .Mkv, MOV or AVI by uploading or Dragging & Dropping your video file from your PC into the online studio.
Step 2. Auto add subtitles
Imvidu will generate transcript which then lets you do multiple things:
- Automatically add subtitles to your video
- Export transcriptions or subtitles as text files
- Even edit your actual video using the words
- Acts as a video to text converter

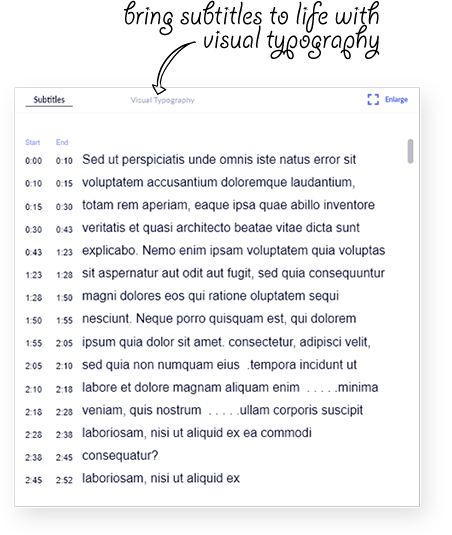
Step 3. Tweak or Edit Generated Subtitle Text and Timing
This is an optional step. The generator produces subtitles automatically, so you only need to do this if you see any errors.
You can simply tweak the subtitle text, timing or fix any errors the auto-transcription generates, like editing a word document. The changes will come through to your video automatically!
4. Export Video or SRT File
Once you’re happy, simply export your video, the transcription file (in Word format), or the subtitles as an SRT file.
The auto generated subtitles will be burnt on your video, so you can host it anywhere you like.
More than just adding subtitles to videos...
...turn your dull videos into fancy looking clips!
Play Video about Turn your videos into clips
Cut, crop and style for social media in a few clicks
- Create snippets from your longer videos
- Vertical story videos
- Square videos
- Bite size videos
... Edit your video using the transcript!
Play Video about Edit video USING text!
Yep! Edit videos using text
- Cut text = cut video
- Remove filler words and silences with ease
- Add overlays on text = add on top of video
- Cut, split, trim your video with text!
Create snippets and highlights in minutes
Play Video about Create snippets from video
Create more, fresh content that's uniquely yours...
- Use text to highlight
- Create unlimited snippets
Why use an online tool to add subtitles to videos?
Old way of adding subtitles
- Subtitles have to typed out
- Repeatedly play/pause and listen to audio
- Generate and edit time stamps is tricky
- Time consuming and tedious
- Language barriers
How traditional tools add subtitles to video!
When you use traditional video editing tools, you have to manually listen to the dialogue in the video, and manually type out the subtitles.
Only recently has Speech to text been used in some video editing apps. Even then the experience is still tedious and poor.
If your favorite video editing tool uses the above method. You can use Imvidu to generate subtitles automatically, export the file and import it into your video editor too.
Imvidu takes it one step further though. Adding and editing subtitles is as simple as editing a word document.
Why add subtitles to videos online?
- System auto transcribes
- Easier to edit and delete text
- Use online to upload video and extract subtitles anywhere
- Export as editable text files for other use cases
How Imvidu adds subtitles to video!
Imvidu Studio works automatically, so it allows you to add subtitles to MOV, Mp4 or Avi videos and in a couple of clicks.
You don’t need to type or sync your subtitles manually.
Your subtitles are added based on auto-speech-to-text transcript (based on dialogue in your video). So it will not only pick up any dialogue as text, but it will automatically sync to the timing as well.
No Credit Card Required. The subtitle generator works online – no downloads or installations required.
Auto transcription hours are capped monthly on pro rata basis.
Auto transcription hours are capped monthly on pro rata basis.
Why add subtitles to videos?
#1 More engagement and views
Did you know that nearly 85% of videos on social media are watched on mute?!
With Imvidu Studio you can auto generate subtitles in a few clicks, then either overlay them on your video (hard code on your video) or you can export as a separate text (.srt) file.
Hard coding your subtitles on the video is best when you want to upload videos to social media. Having a separate file is useful if you’re planning on uploading your video into a video streaming service (e.g. YouTube, Vimeo, Wistia etc). This gives your viewers the option to watch the video with or without subtitles.
#2 Better Accessibility by using a subtitle generator
Remember not all users are able to listen to dialogue. If you want to engage a wider audience then make sure your content can be consumed by users with disability or accessibility issues.
#3 Better viewing experience
Sometimes your audience isn’t in the mood to listen to you talk or needs to turn the volume down! When doing talking head or vlog editing it’s important to add subtitles so that you audience doesn’t miss out on a word you say.
The same applies to a video podcast or a video interview. It can be easy to miss out on what someone says in a video easily. You’ll save your viewers time and provide a better experience if the user doesn’t have to continuously scroll back to listen again.
Questions on adding subtitles to video
How much does it cost to add subtitles to video?
You can start using the video subtitle generator for free.
Paid plans are available. Pricing for adding subtitles depends on what plan you are on.
You can add subtitles to your videos from as little as $12 per month which gives you ample upload limits. If you want to do more videos, you can simply purchase more credits (by the minute) or you can upgrade to a higher tier.
What's the difference between closed captions and video subtitles
There is a slight difference between closed captions and subtitles.
Subtitles primarily are the text version of any dialogue in your video.
Whereas, captions (closed captions) include more information in the text. For example closed captions might also say the name of the person talking, type of music or name of the song playing in the back ground, any other usefull information the viewer may benefit from, especially if they have a hearing disability.
Are the added subtitles auto generated?
The subtitles are auto-generated. This is different to traditional video editing software where you have to manually type out the subtitles.
The automatic transcription used in the platform is about 85% accurate. That means, you may have to fix any typos or errors generated in the automatic video to text.
Can you do closed captions also?
You can edit your subtitles manually and include more information in there so they are closed captions.
We also offer a professional hand typed transcription service.
Because we carefully and manually type these out, and go through a secondary quality assurance process, we achieve an industry leading 99% accuracy rate on these transcriptions.
You can also opt to have the transcription as a Word file (.doc) and as a Subtitle file (.srt).
How long will it take to add subtitles to my video?
The transcript process depends on how long your video is. So, the time taken to generate the transcript is generally proportional (but typically less than) to the length of your video.
Once the transcript is generated, subtitles are added automatically.
Do I need to download anything or can I use the generator online?
You simply go to the studio.imvidu.com, sign in and upload your video.
Click on Generate Transcript. This will automatically generate the subtitles online. Your subtitles are saved online also, so you can share and download anywhere.
How to add subtitles to mp4
You can auto generate subtitles with Imvidu Studio:
- Simply upload your MP4 file into the studio.
- Click on ‘Generate Transcript’.
- This will auto generate subtitles (with timestamps).
- You can then style your subtitles.
- The subtitles will be burnt onto the MP4 video file.
Note: The video file when exported will be downloaded as an Mp4 file also.
Does the Imvidu Subtitle Generator only add subtitles to videos or can it generate subtitles as a separate file?
The subtitles are generated and can be exported as an SRT file. This let’s you upload subtitles on other video hosting services for example YouTube, Vimeo, WordPress etc. Most of these services give you an option to upload and attach your subtitles to your video.
Viewers can usually turn these on or off as they’re not burnt on top of the video.
Alternatively, instead of exporting the subtitles on their own, you can export the transcript file. You can place the transcript below the video or turn into other pieces of content.
The third option is yes, you simply burn the subtitles on your video automatically. When the video is exported through Imvidu, the subtitles will be ‘hard-coded’ on top of your video. With this method you do not need to upload subtitles separately, and viewers can’t turn these off.
No Credit Card Required. 100% online.